Wednesday, February 6, 2013

The Radiantly Mad King and his Retinue - Week T-2

This is Madness.
Hello. How are you.
Don't answer that. It wasn't a question.


Then Came a Second Title
For the past eight or so weeks of class and a good portion of the two weeks over break, I and my imaginary colleagues have been diligently chugging away, pouring hours of work into what I can only assume is my thesis project.
Maybe.
At least I'm pretty sure.
I'll get back to you on that.


Plot Summary
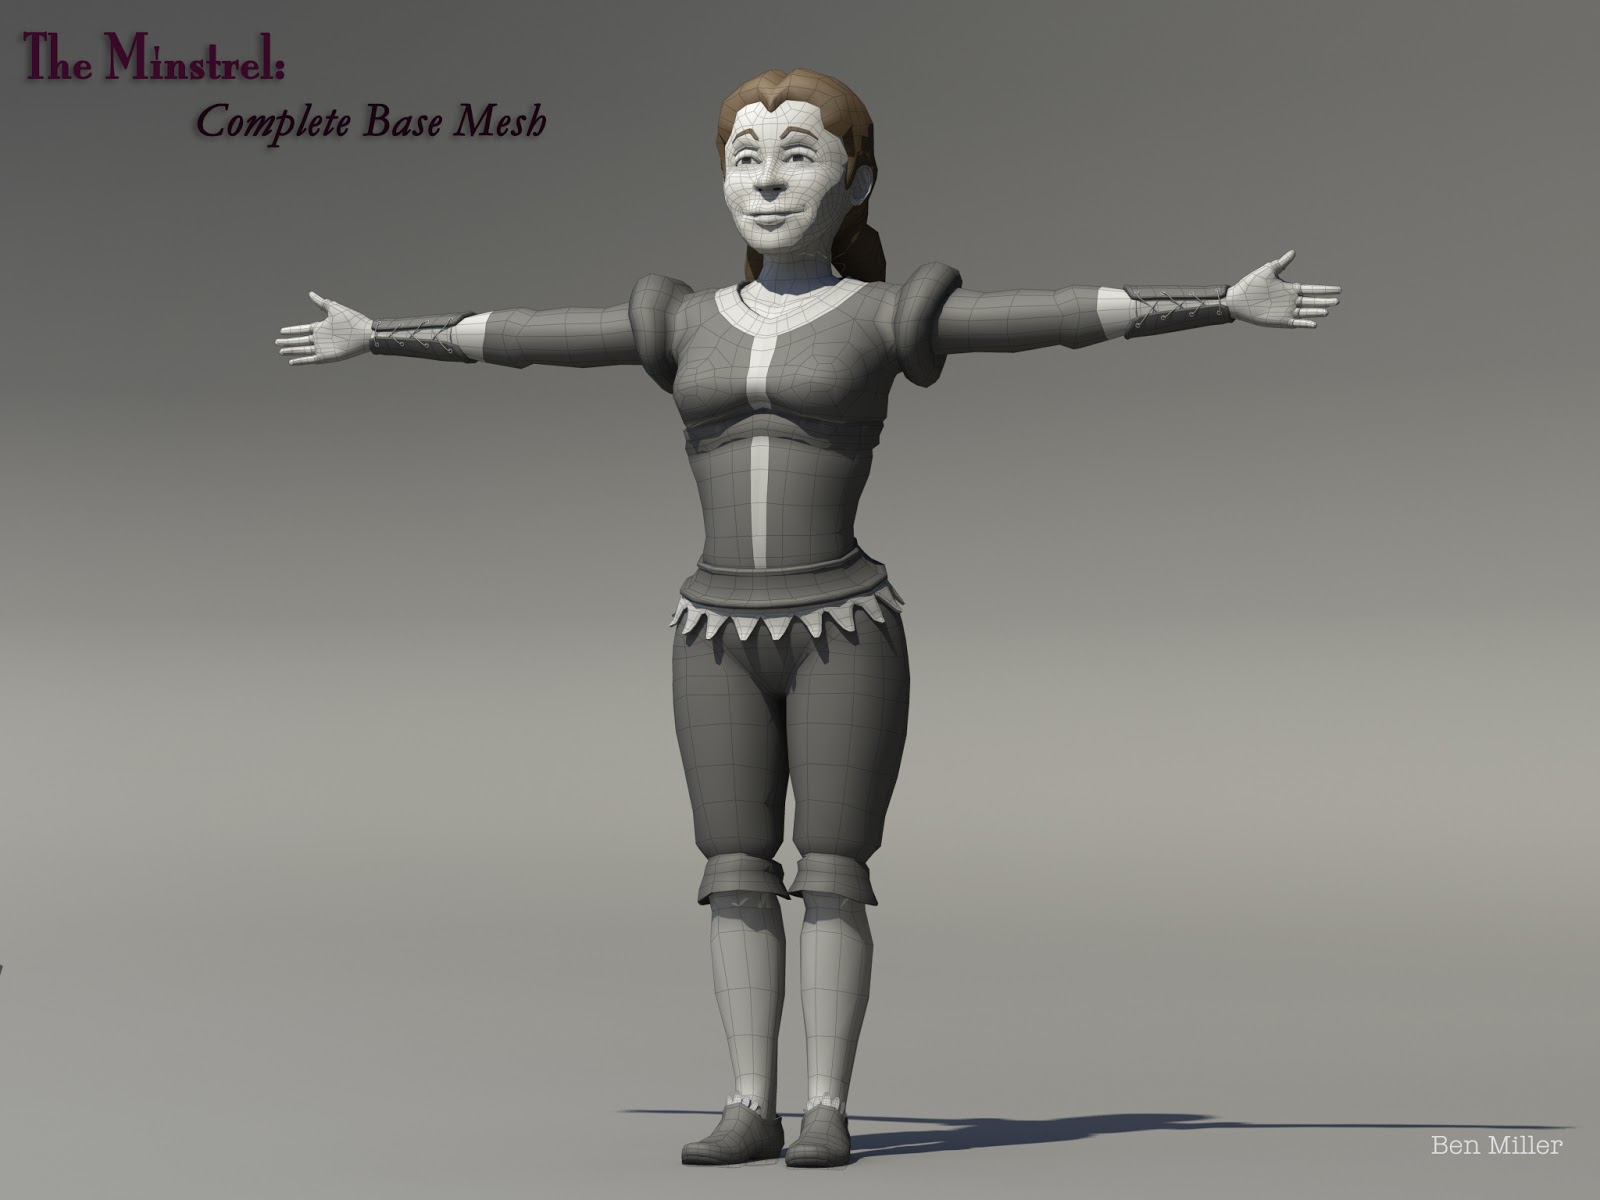
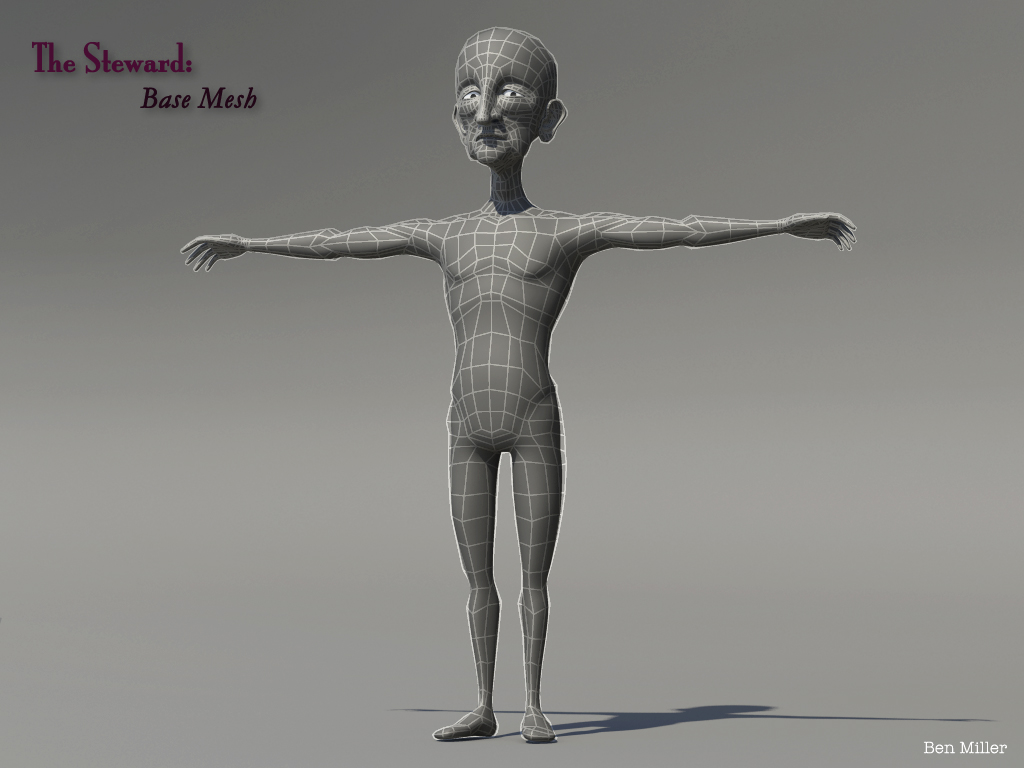
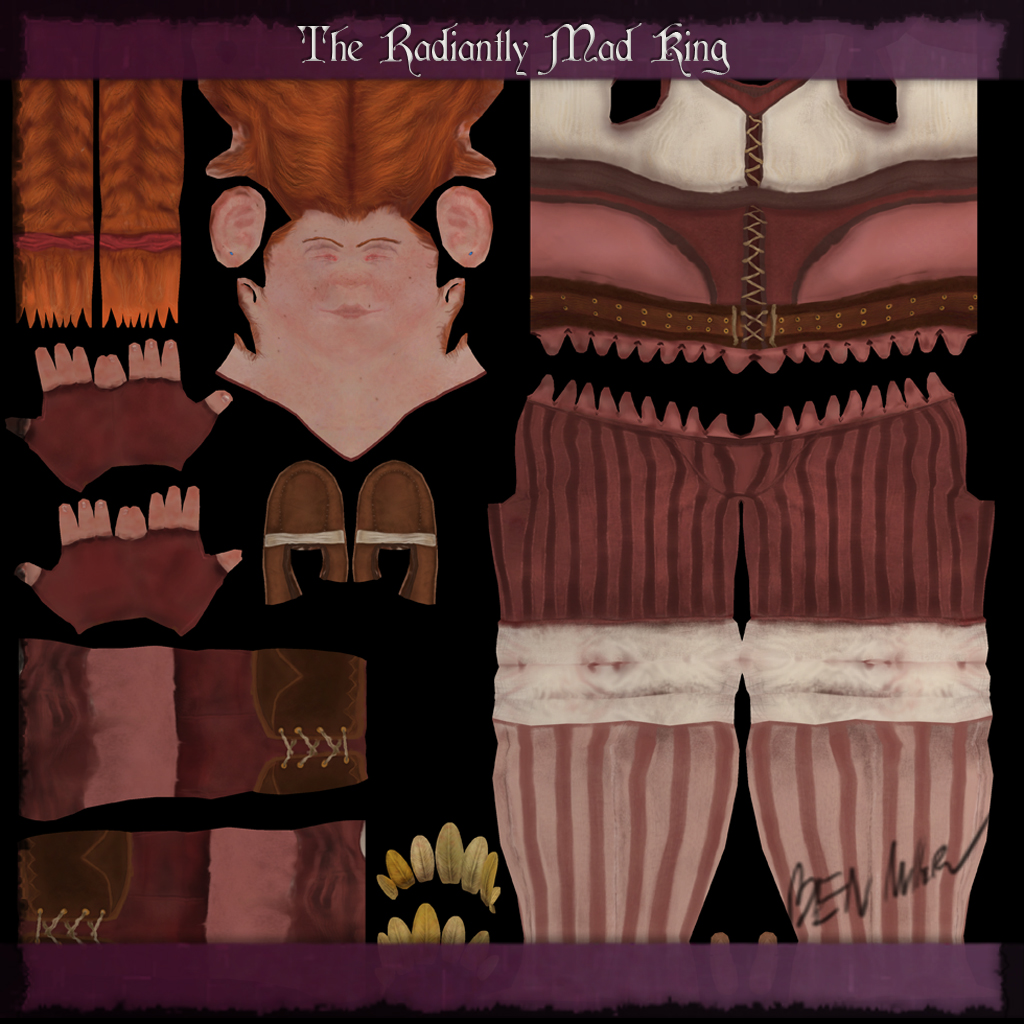
To make up for my lack of pictures to sate your curiosity in the past dozen weeks, I generously offer these carefully prepared and a few secretly unprepared renders to satisfy your unquenchable curiosity about my progress. In addition, I will list the major changes I've made since last quarter (pretty much the entire project). PICTURE ON!


First, some awesome renders from my most recent progress.


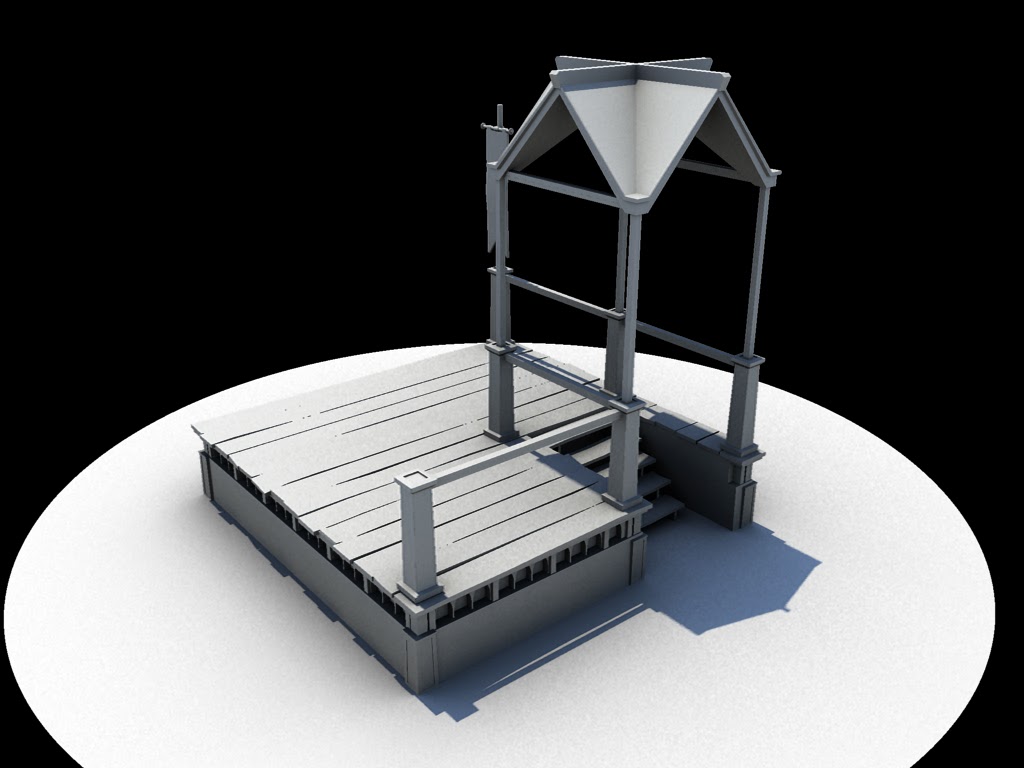
Here are the stages I'm working on.


Then, some other progress showing my sculpts and models.


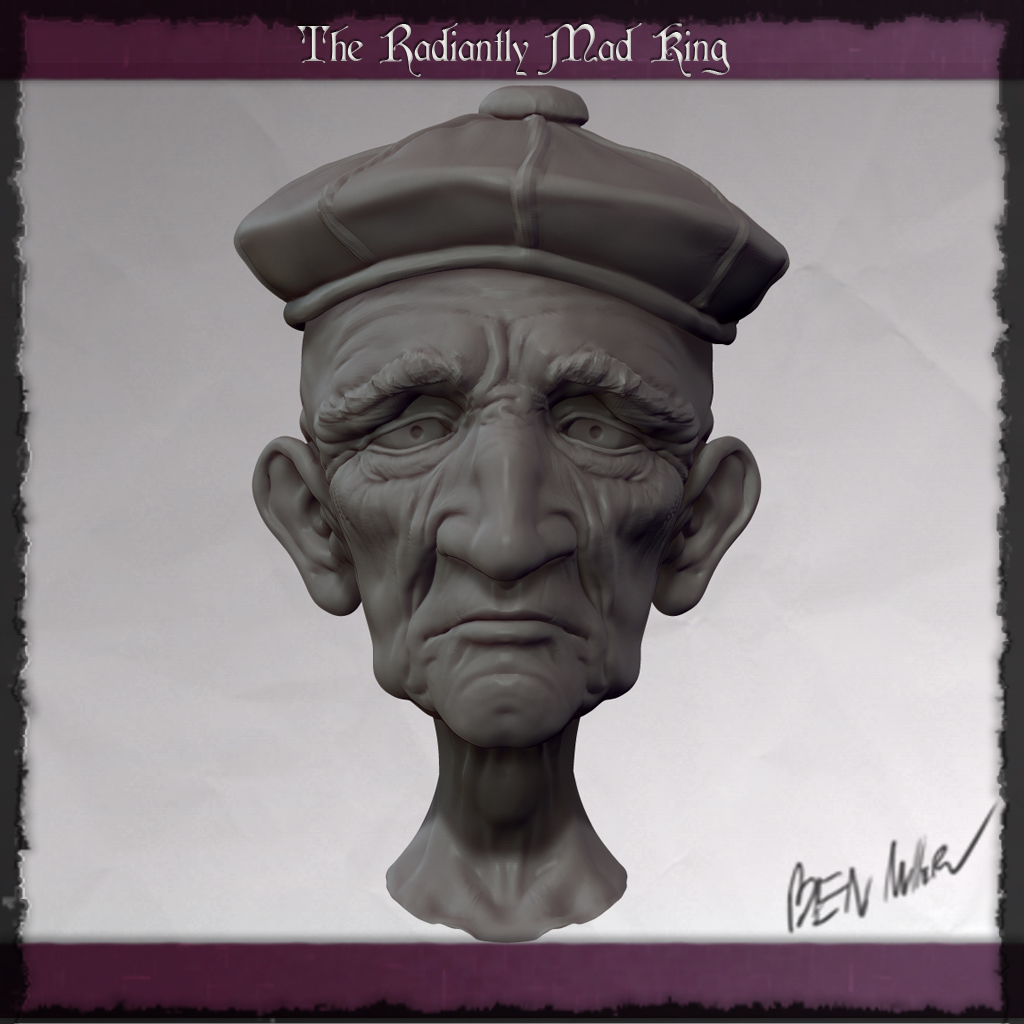
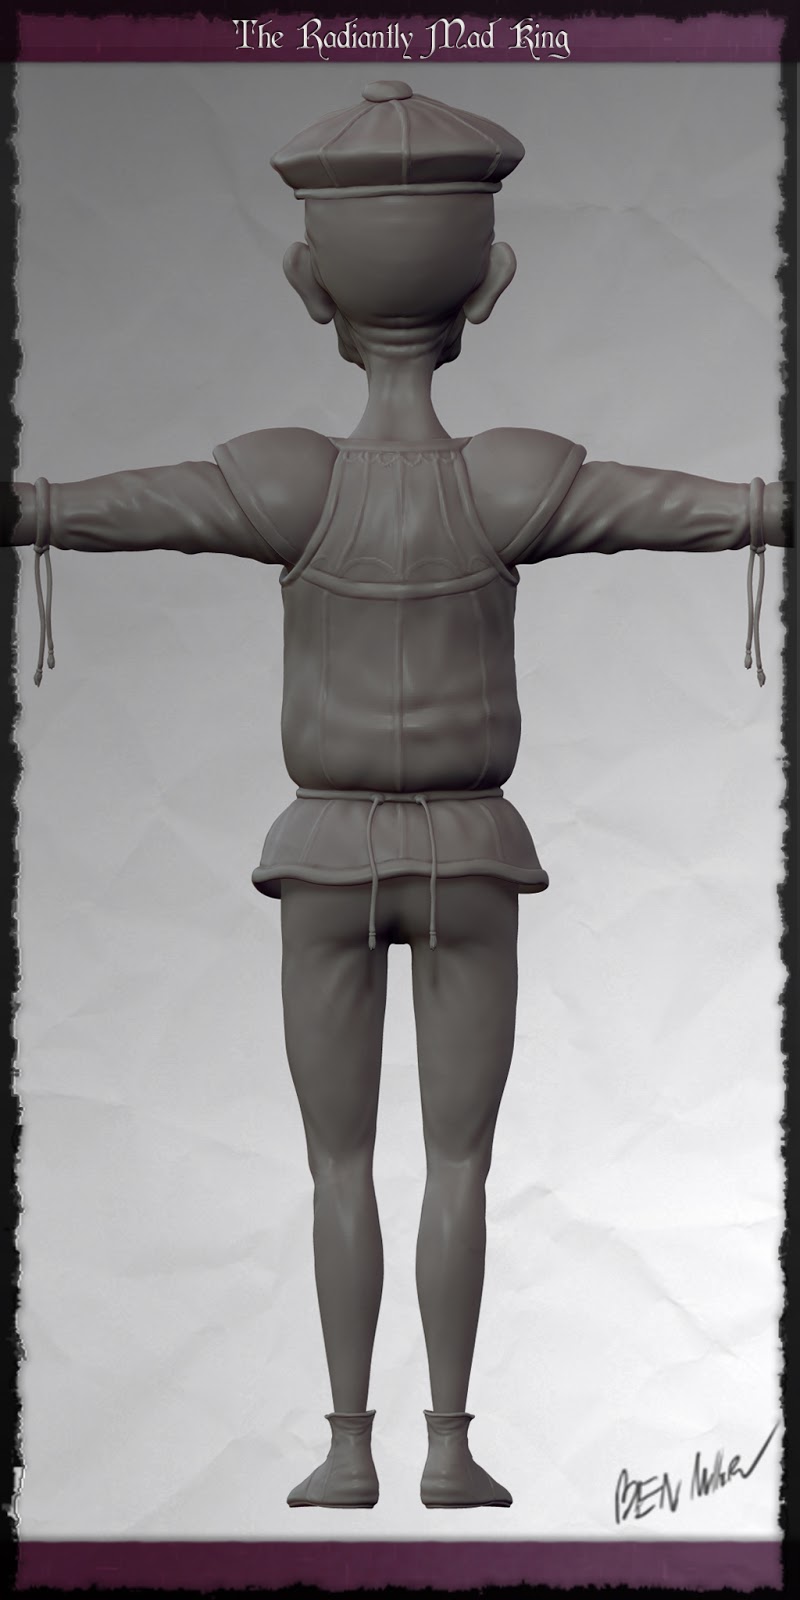
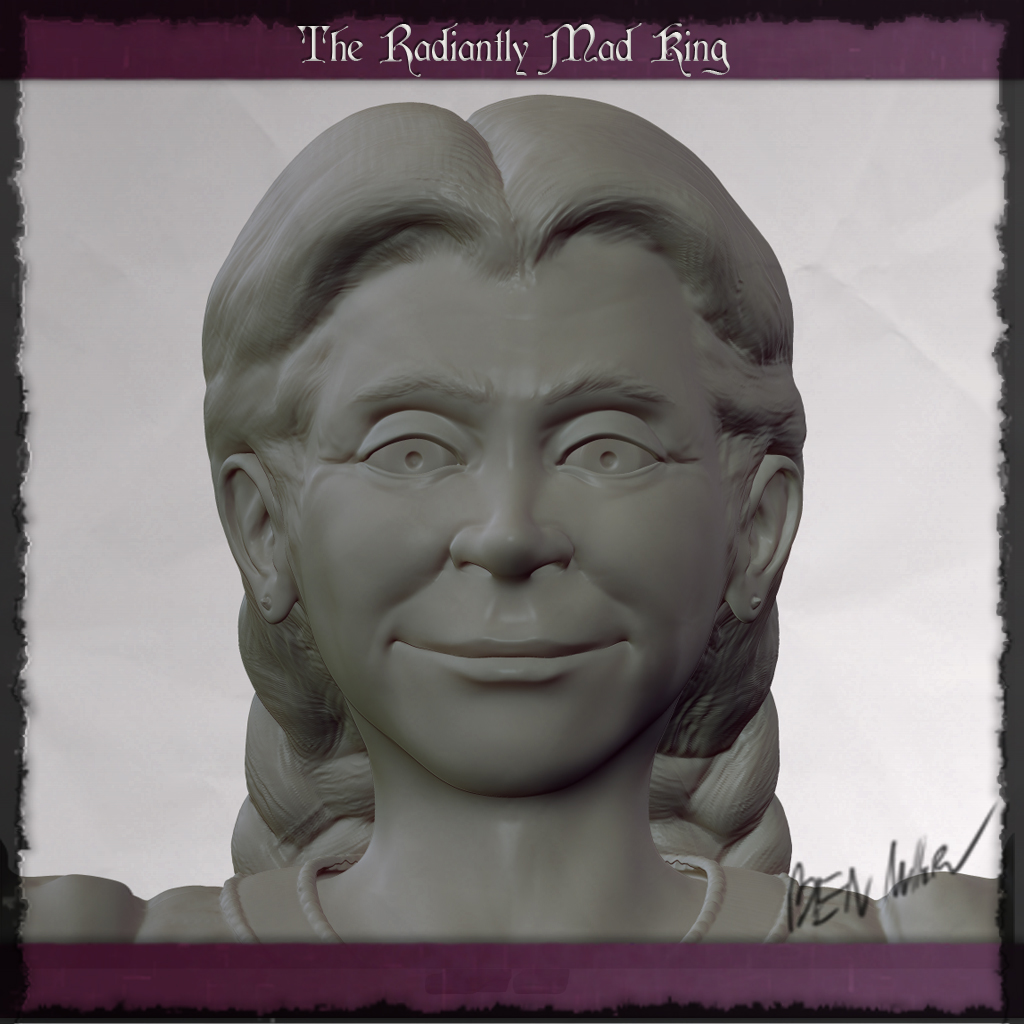
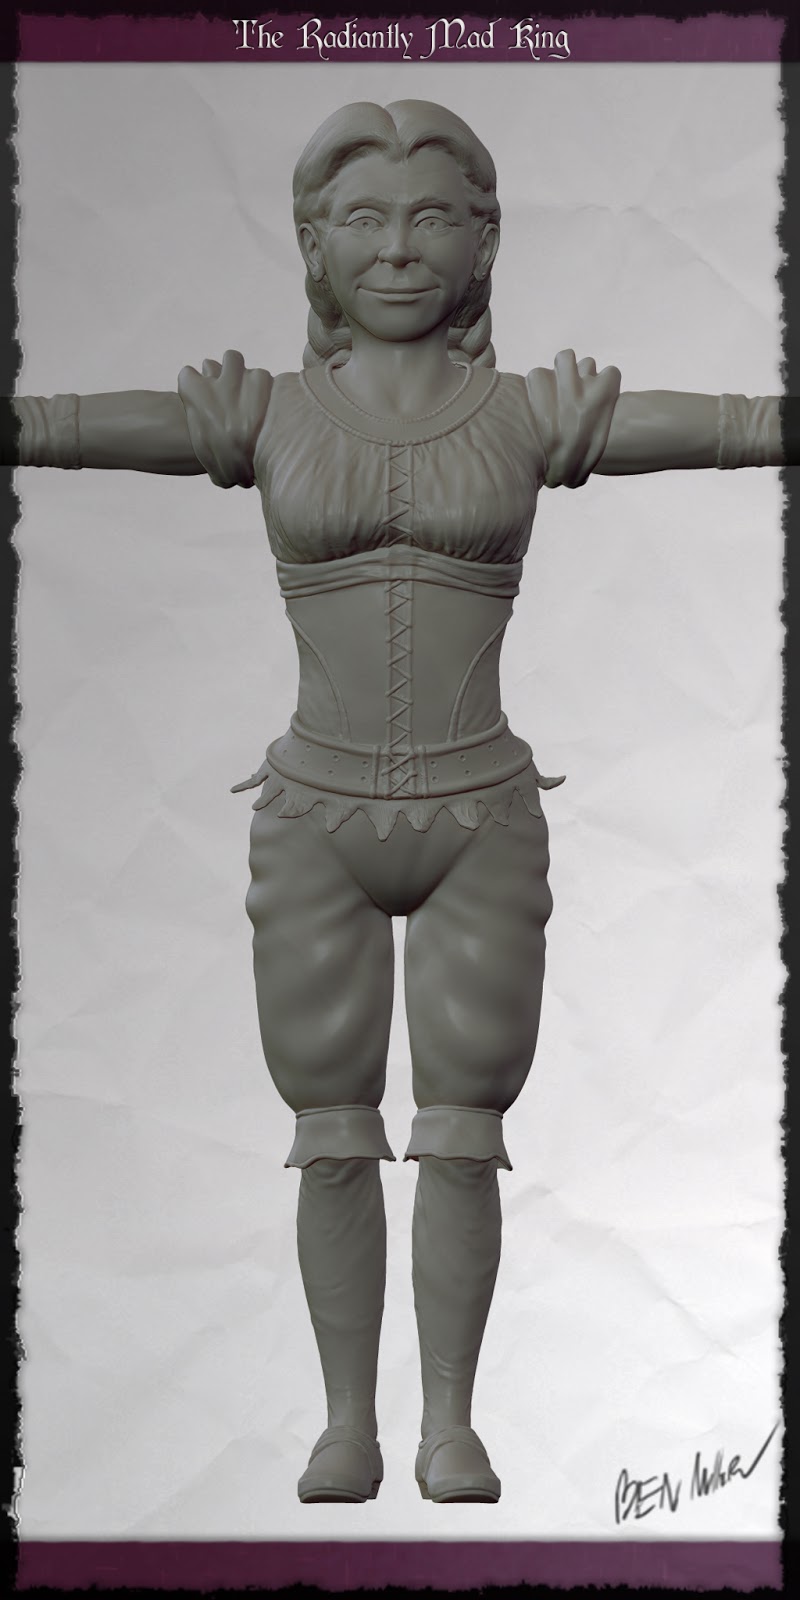
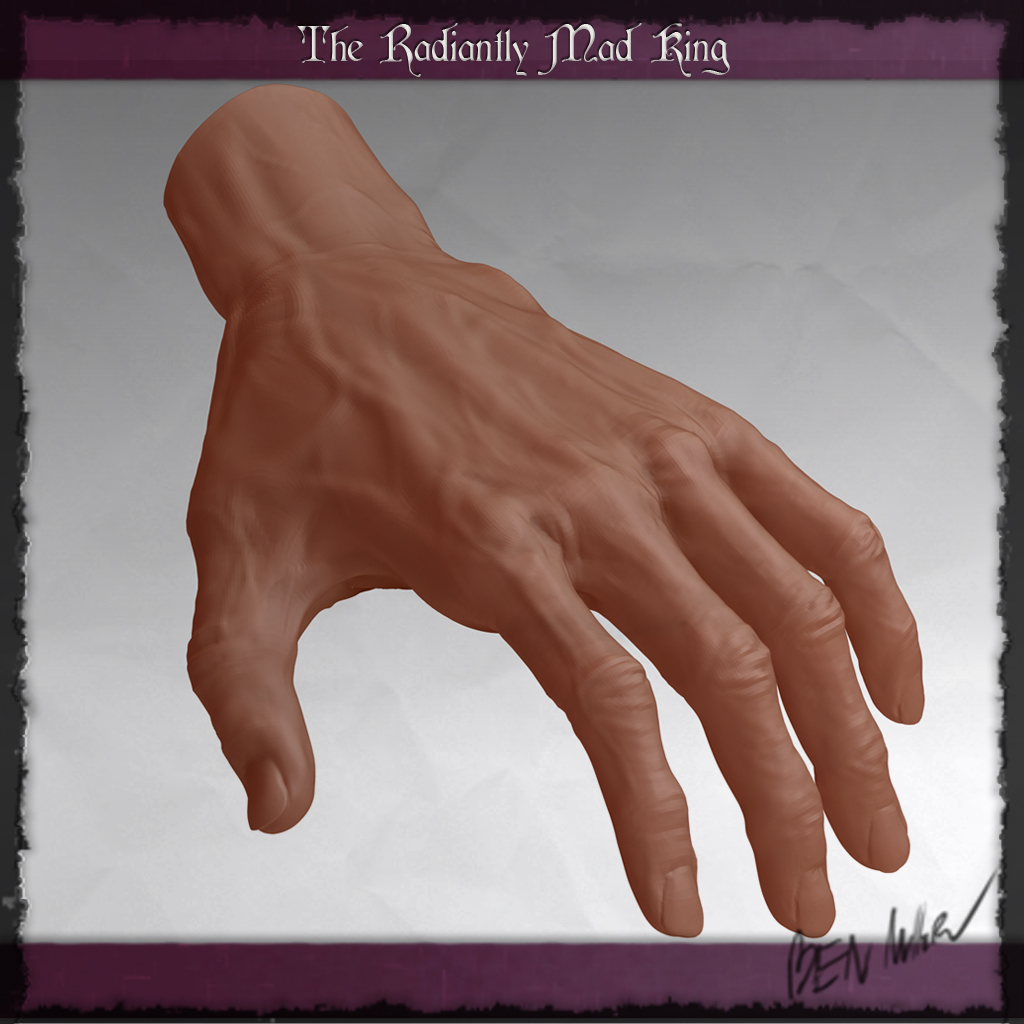
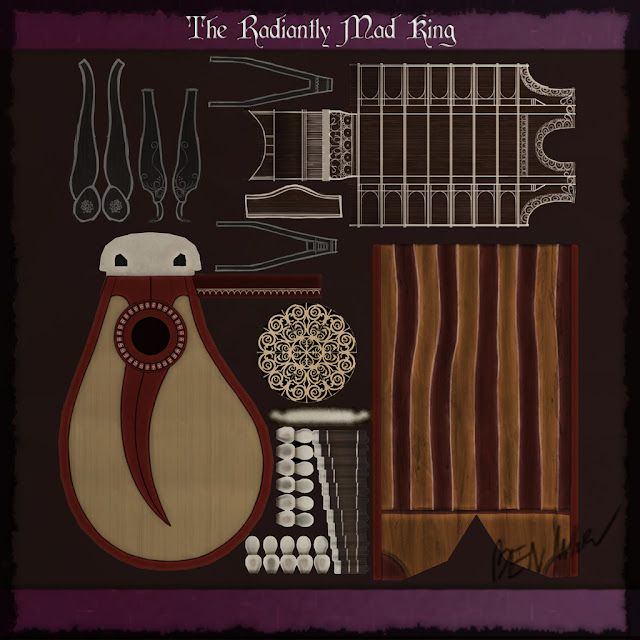
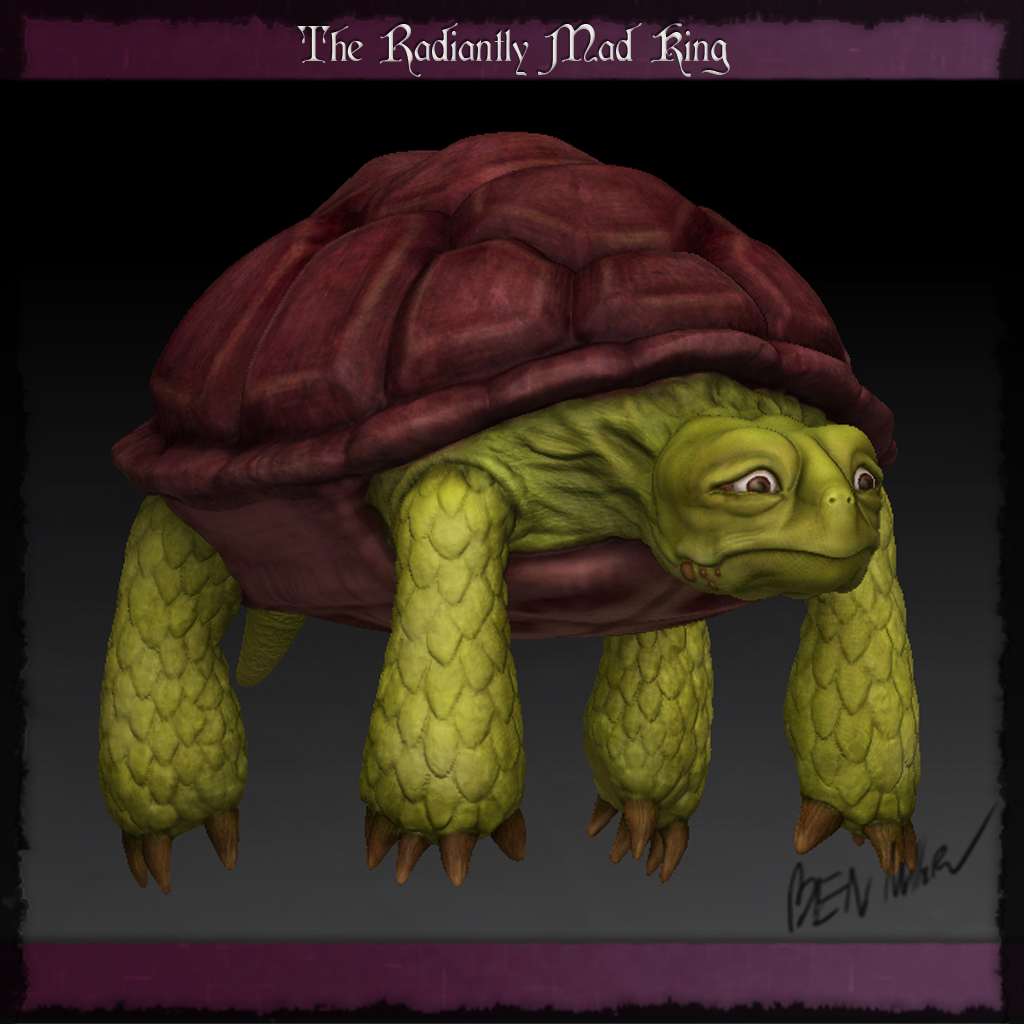
*I took the base modeled characters and sculpted them in much greater detail using ZBrush, including the king himself who was in great need of a reworking.
*I then hand-painted them, also in ZBrush with a dash of Photoshop, paying close attention to color palettes and a sort of pre-rendered AO look that I use.
*After painting, I took the detailed models and posed them as elegantly as possible, fitting the curve of a character's spine to their personality so to speak.
*In this process, I managed to mix my UVs up a little bit (just a little), possibly when I combined and separated parts for easier working. Two meshes also accumulated a lot of radioactive file corruption, becoming unstable in surprisingly predictable ways, sending vertices into the nether region beyond the void of the canvas and performing other death-defying feats without becoming fully corrupt. I spent an entire weekend recovering these meshes (rather than reposing which would have taken a few hours) with the result that one of my meshes no longer can be reduced from its highest geometry state (not ideal for rendering).
*After collecting cleaned meshes for posed and unposed models, I set them into the same file, incorporating them into a scene.

*Most importantly, I've decided what can and can't be done in the following weeks. As of last week, my environment (which I may never have posted until now) is out of the picture- too complex to finish at the right level of detail. Now I'm using a set of quickly modeled wooden stages to display the characters (I always called my environment a stage, even after I modeled it). This is what I am working on right now, that and figuring out how to render it properly.

Wednesday, November 7, 2012

The Radiantly Mad King - Week 9


The First Final Stretch
We're down to one more week for the first half of the time allotted to our senior thesis projects and we'll soon know whether we'll be working on them over break (hint: yes).


The Sad Turtle
The biggest product of this past week's labors is the Sad Turtle. Because I'm getting really into the sculpting through Zbrush workflow lately I decided to skip the modeling stage entirely by using zspheres instead. It went much quicker, though I have to learn to keep the detail simple at this stage rather than taking it as far as before it is even in geometry.
My first sketch using zspheres was based on my drawing of the sad turtle and ended up having distorted proportions and didn't really look right. I focused most of my time on getting the shell to be the right shape and the holes in it to be placed correctly.
After the zspheres comes the base sculpting. At the moment I like to resist the urge to raise the division level high because I know it's more important for me to focus on getting the base form right. After some experimentation, I decided to make the head of the turtle match a photo as closely as I could (at this low level). I knew that it would be much easier to pull the geometry around and stylize the turtle after I made it look like a turtle. In the end I got the form looking the way I wanted.
The final step was to retopologize which was done in ZBrush. While I like the simplicity of being able to do this straight from ZBrush, I wish it had a slightly improved interface for selecting and merging points. I kept missing points that were nearly on top of each other but not merged.


The Antique Bird Cage
I did most of the model for this last week but, looking back at it, hated the geometry of a lot of it. I cleaned up and remodeled most of it, making my proportions a bit better. I modeled the door flat and then bent it to match the curve of the cage. I plan to do the lower level of metal filigree as texture maps with alpha channels.

For some reason Maya also kept deleting my mesh as I was undoing, forcing me to do pieces all over again.

Thursday, November 1, 2012

The Radiantly Mad King - Week 8, 7


The Minstrel and The Steward
In the past two weeks I finished up both the Minstrel and Steward base meshes. Both of them are almost entirely one piece all the way from their shoes to their heads and hands. The only things that are separate are things like the laces on the minstrel's bracers. After a few more failed attempts at modeling braids, I realized that the best way to do it was just to sculpt them and retopo over them, so I took a cylinder into mudbox and sculpted some nice looking braids.


The Lute and the Birdcage
I started and mostly finished these two assets this week I put a bit too much detail into the lute for what I need but I was having fun with it (when's the next time I'll model a lute?).


Other
For whatever reason, I designed unique shoes for the other two characters as well.


Up Next
In the last few weeks, I will need to finish up the cage, model the turtle, make some quick scrolls to stick in the steward's belt, and model the stage itself.

Wednesday, October 17, 2012

The Radiantly Mad King - Week 6

The Minstrel
This week I moved on to the outer layers of the characters. At this point my goal is just to achieve clean base meshes with good topology and minimized separations so that they are better prepared for sculpting and texturing later on. I spent a lot of time finishing up the body base mesh for the steward which I didn't finish last week before moving on to her outfit. I tweaked the face nearly to death trying to get different proportions and styles and decided to shrink the chin of my original design because it just wasn't working out in 3D.

 I gathered most of my sketches together so that  I could look at all of them while I modeled. Before I imported them to maya I lined them up about as much as they could be. This allowed me to slide the plane around and choose which image to use.


 There are a few details that need to be modeled straight on to the outfit like the strings of her shirt and bracers. At times I tried to experiment with the topology to include various extra lines but in most cases I found it was much safer and easier to create the lines during the sculpting process (the V shaped line up her chest, for example). Here's the outfit as far as I've gotten so far.


Something I really struggled with (for some reason) was modeling the braided hair. I know the simple ways to model it, using just two pieces offset from each other in a line (ZBrush Hair Example) but I wanted to try to actually model the braids flowing through more accurately. I had a lot of reference images to go by and drew out the shape of the hair from three angles before I started. Right now I still only have a base mesh to go by for its shape but it's getting there.


I also quickly drew up a design for her shoes based on what I felt was a stylized shoe shape (clogs). I added the little feather shapes just for style.


Just a sketch for eye edge flow.

A final thing to mention in terms of progress on this project is that I've begun organizing my files a lot more. I now include the week number in my naming convention so I don't have to compare my various back up files so much and I keep much cleaner folders to sort through maya projects, digital sketches, references, and various other things. Visually I also organize my pictures (the important ones) using document styles. All of my renderings have been on the same lighting rig which is now exported into a separate project so I can continue using it that way; my entire design document had its own paper background; and my original sketch collections and renders had the ticket border which I'm still using on anything worth framing.


Wednesday, October 10, 2012

The Radiantly Mad King - Week 5

The Wheel Turns
This week is the first week of production! Appropriately, it's also the week I chose to drop my laptop off a table, damaging the mac partition and sending it to the shop for a while. Fortunately, this entire project has been backed up in several locations and I wasn't set back at all. Unfortunately a separate project was lost and I had to make up that work using time set aside for my thesis (not an excuse though). For the moment I'm stuck working in the labs where I can only harness the power of one screen at a time (I can't start watching the rigging and displacement videos while I model in other words).

Though it wasn't intended for use in this project, I sculpted the head of an old man similar to what I needed for the Steward using Mudbox's default head. It turned out surprisingly nice considering I haven't used Mudbox in half a year and was using my laptop's trackpad in the middle of class. This is the only thing I can think of that I might have lost that was part of this project.

For this week I intended to have the base meshes of both the Minstrel's and the Steward's bodies and heads completed and the meshes UVed.


The Steward
Anyway, I managed to get the base mesh completely done for the body and head of the Steward as well as some new side image planes to help with the modeling. I found that the thing that took me longest was trying to make my edge flow mimic the musculature (which I now know decently!). Along with the amount of time I put into this and the time I put into modeling similarly unnecessary features on my Rhino for my high poly modeling class, I've realized that the base mesh no longer needs to represent such details. Instead, I should be modeling extremely simple base meshes and using normal and displacement mapping for all the details (not just the fine ones). A good example is this project by Selwy in which a single base mesh was sculpted into more accurate representations of the characters and then taken to an insane level of detail without worrying about getting really any specific details in the mesh.
http://www.selwy.com/2008/male-01/

Here's what I ended up with for the Steward. I'll be taking this and sculpting and texturing it next quarter along with his outfit which I'll model in the coming weeks. For the heck of it I gave him a simple eye rig so he can look at the camera.


The Minstrel
The Minstrel was a bit harder because her face was simplified even more so that it would be stylized. In drawing it simpler, I used harder lines with larger empty planes in between. The 3D style I'm going for, though, ends up having rounded but heavy contours and lines. Whereas the Steward has wrinkles and the King has a big jaw, the Minstrel's face is relatively smooth. I took some extra time thinking about the planes of the face when drawing up the image planes for her. I didn't finish the mesh but I got decently far in it. I'm going to try to finish it later today so that it's out of the way. I was in the middle of redoing the nose when I stopped to render these out.


Wednesday, October 3, 2012

The Radiantly Mad King - Week 4

Design Document and Presentation

This week I spent a lot of time putting together the design document and presentation for our pitch following the completion of the pre-production phase. In addition to that, I did more designs for the guard, the queen, and a bit for the steward. These are all compiled nicely into the custom made design document pages that I'll post here.


As usual, I put a lot of time into the project but wasn't necessarily that efficient with it. I've been doing a poor job of knowing when to call it quits for the night and the effectiveness of my work falls off around 3 o'clock in the morning. Anyway, here's my time:

1:00 - Listing characters by importance. Listing assets needed for them and the environment. Listing materials. Describing the stage.
1:00 - Armor design, research, and drawing techniques.
2:30 - Sketching the guard posed and with his latest armor.
1:00 - Adding to the character card sketches (the guard's armor and fixed arm proportions)

0:30 - Fixing the king on the character card sketches.
1:00 - Reading the "Dynamic Figure Drawing" book.
1:00 - Creating color swatches for most of the characters on the character card sheet.
0:30 - Character design research.
1:30 - Buying nice clothes for the presentation.
8:00 - Compiling everything into a design document. Being generally slow about it.
2:00 - Coming up with a presentation in the wee hours of the morning.
0:30 - Updating blog.