The Minstrel
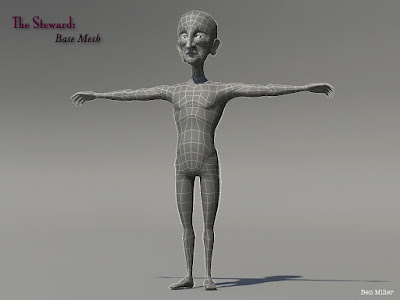
This week I moved on to the outer layers of the characters. At this point my goal is just to achieve clean base meshes with good topology and minimized separations so that they are better prepared for sculpting and texturing later on. I spent a lot of time finishing up the body base mesh for the steward which I didn't finish last week before moving on to her outfit. I tweaked the face nearly to death trying to get different proportions and styles and decided to shrink the chin of my original design because it just wasn't working out in 3D.
There are a few details that need to be modeled straight on to the outfit like the strings of her shirt and bracers. At times I tried to experiment with the topology to include various extra lines but in most cases I found it was much safer and easier to create the lines during the sculpting process (the V shaped line up her chest, for example). Here's the outfit as far as I've gotten so far.
Something I really struggled with (for some reason) was modeling the braided hair. I know the simple ways to model it, using just two pieces offset from each other in a line (ZBrush Hair Example) but I wanted to try to actually model the braids flowing through more accurately. I had a lot of reference images to go by and drew out the shape of the hair from three angles before I started. Right now I still only have a base mesh to go by for its shape but it's getting there.
This week I moved on to the outer layers of the characters. At this point my goal is just to achieve clean base meshes with good topology and minimized separations so that they are better prepared for sculpting and texturing later on. I spent a lot of time finishing up the body base mesh for the steward which I didn't finish last week before moving on to her outfit. I tweaked the face nearly to death trying to get different proportions and styles and decided to shrink the chin of my original design because it just wasn't working out in 3D.
I gathered most of my sketches together so that I could look at all of them while I modeled. Before I imported them to maya I lined them up about as much as they could be. This allowed me to slide the plane around and choose which image to use.
There are a few details that need to be modeled straight on to the outfit like the strings of her shirt and bracers. At times I tried to experiment with the topology to include various extra lines but in most cases I found it was much safer and easier to create the lines during the sculpting process (the V shaped line up her chest, for example). Here's the outfit as far as I've gotten so far.
Something I really struggled with (for some reason) was modeling the braided hair. I know the simple ways to model it, using just two pieces offset from each other in a line (ZBrush Hair Example) but I wanted to try to actually model the braids flowing through more accurately. I had a lot of reference images to go by and drew out the shape of the hair from three angles before I started. Right now I still only have a base mesh to go by for its shape but it's getting there.
I also quickly drew up a design for her shoes based on what I felt was a stylized shoe shape (clogs). I added the little feather shapes just for style.
Just a sketch for eye edge flow.
A final thing to mention in terms of progress on this project is that I've begun organizing my files a lot more. I now include the week number in my naming convention so I don't have to compare my various back up files so much and I keep much cleaner folders to sort through maya projects, digital sketches, references, and various other things. Visually I also organize my pictures (the important ones) using document styles. All of my renderings have been on the same lighting rig which is now exported into a separate project so I can continue using it that way; my entire design document had its own paper background; and my original sketch collections and renders had the ticket border which I'm still using on anything worth framing.


